Create a centralized hub for your forms with the Form Network module. Distribute your forms across multiple sites effortlessly, maintaining control from a single point. It’s the ultimate tool for managing a wide-reaching form strategy with precision and ease.
- Centralized form management
- Easy distribution across multiple sites
- Streamlined form updates and control
Form Network

“The Gravity Hopper Form Network has been a critical tool in our strategy of managing client sites. Distributing and syncing forms across sites is now a breeze.”
Disclosure: This testimonial provided by AI. Do your part to fight the machines by submitting a testimonial of your own.
Documentation
Form Network
Network Configuration
Create a Network Hub
In order to create a network, you’ll need to first setup a central network hub.
While not required, we highly recommended that, for your network hub, you install Gravity Hopper on a clean and secure WordPress installation and not on an operational live site. This will help eliminate any unwanted plugin conflicts and will better ensure the security of both your dashboard and your networked sites.
To initialize a network hub, download Gravity Hopper from your account and then install and activate it on the site. In order to use the site as a hub, add the constant GRAVITYHOPPER_NETWORK_HUB to the wp-config.php file of the network hub.
Connecting Sites
Prepare the Site
Before attempting to connect any remote site to your Gravity Hopper network, you should ensure the following criteria are met:
- Remote site is secured with an SSL certificate and is served via HTTPS
- Gravity Forms is installed and activated on the site
- Gravity Hopper is installed and activated on the site
- You are signed in to the site with a user account that…
- …has capability to
edit_posts - …has all Gravity Forms capabilities
- …has application passwords enabled
- …has capability to
Add the Site
The process of adding a site will begin from within your network hub. Authorizing access to the site is a multistep process.

- Within your Gravity Hopper dashboard, visit Forms → Network and click Add New Site.
- Enter the site URL (excluding https:// and trailing slash).
- Click Connect – (if presented with a notice, click Leave Page).
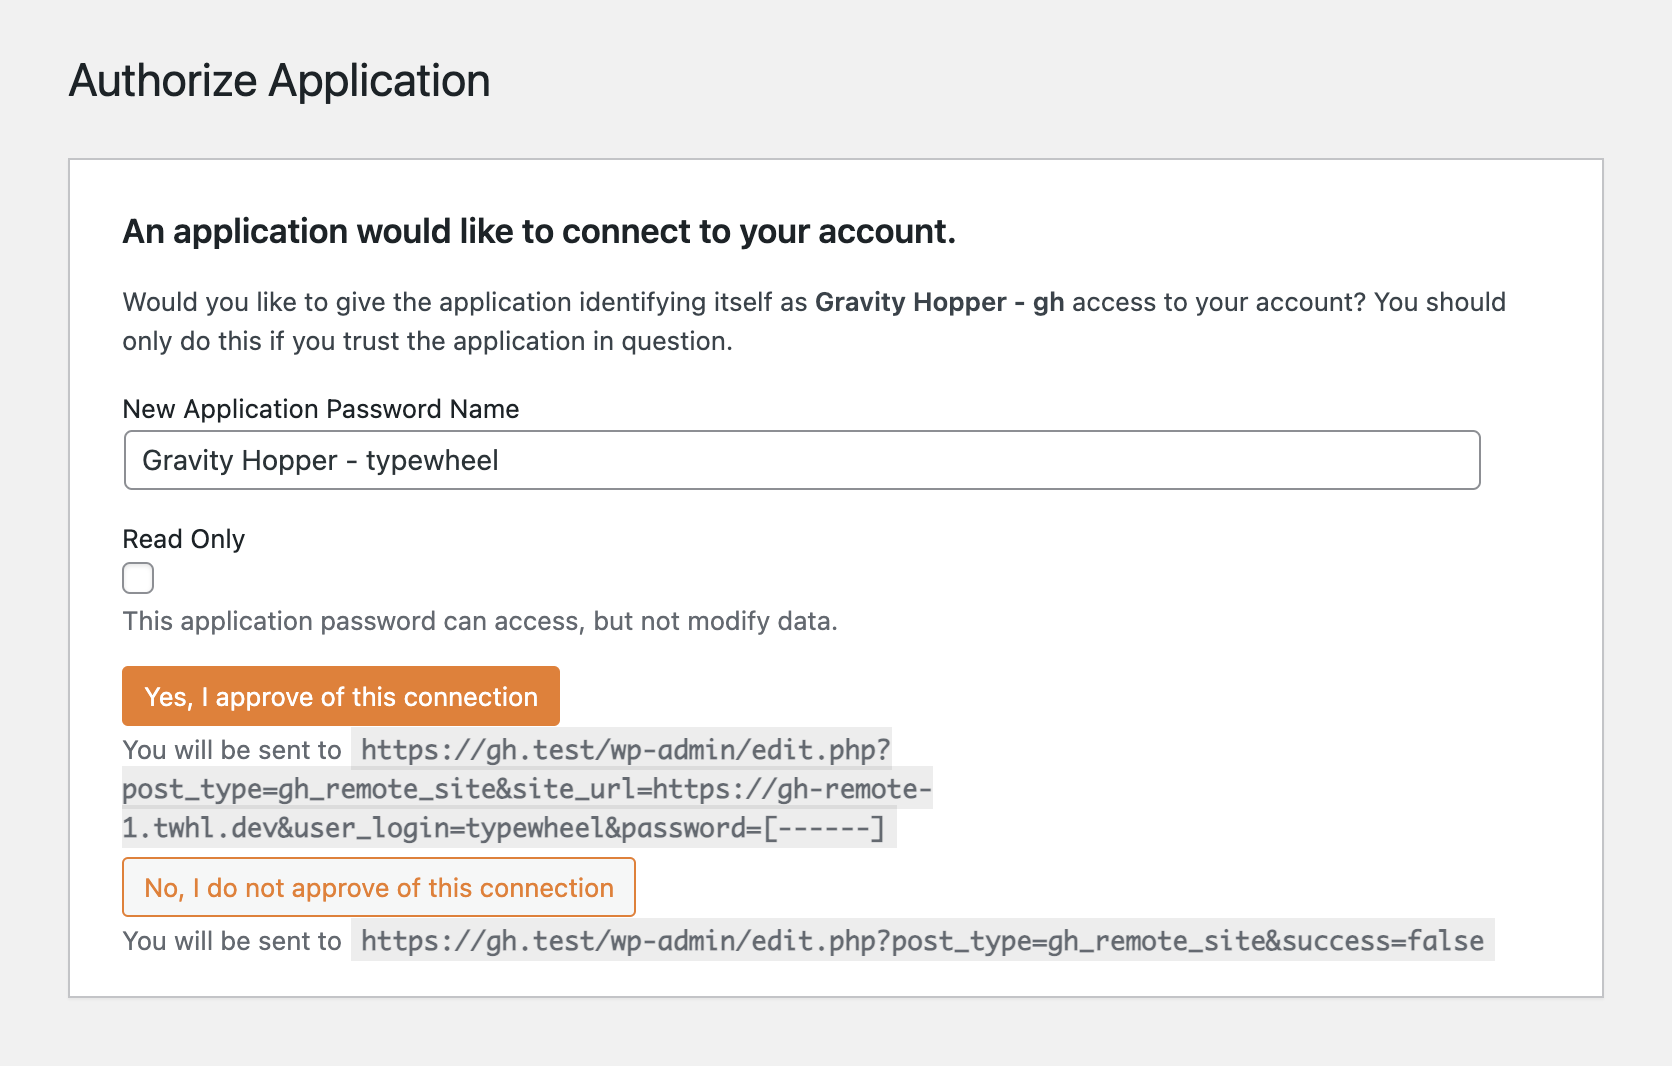
- Once presented with the Authorize Application screen, click the Yes, I approve of this connection. button.

Upon doing so, you will be redirected back to your Gravity Hopper dashboard and your site will be connected.
Accessing Sites
Connected sites can be viewed by navigating to either Forms → Network or to Form → Settings → Network when logged in to your network hub. Within this site table, you will see site connection status, site title, and an overview of form connections.

Clicking into a site will display a list of all forms that exist on that site. Depending on the connection status of those forms, you will be presented with various actions that can be taken.
Feature List
Network Hub
When a network has been established, the following actions will be available for forms on the network hub.
Connect Forms
Clicking this icon will create a connection between a form on the network hub and one on the remote site. Depending on the context from which this button is clicked, either of the following will take place…
- form on hub will be duplicated on remote site and connection will be activated.
- form on remote site will be duplicated on remote site and connection will be activated.
- deactivated connection between form on hub and form on remote site will be activated.
Note that during this initial form connection both the form object and all feeds will be synced between the two sites.
Break Form Connection
Clicking this icon will permanently disconnect forms that have an existing connection.
Push Form to Remote
When forms are connected, clicking this icon will sync form object changes to the connected form on the remote site. Note that feeds are not included with this sync.
Push Feeds to Remote
When forms are connected, clicking this icon will sync feeds to the connected form on the remote site.
Send Local to Remote
Clicking this icon will duplicate the form from your network hub to a remote site.
Pull Remote to Local
Clicking this icon will duplicate the form from a remote site to your network hub.
Remote Sites
The Gravity Hopper plugin should also be installed on the remote sites of a network. This helps to ensure proper site connection and the integrity of forms on each site.
Auto-enabling of GF REST API
Provided Gravity Hopper is installed on the remote site to which you are connecting, it will, upon authentication, auto-enable the Gravity Forms REST API on that site which is required for the network hub to communicate with and manage forms on the site.
Form Protection
Gravity Hopper will prevent editing of forms on the remote site which have a connection to the network hub. This is a feature still in development.

